
Part 4 of 4
Part 3 was all about helping you have better access to your upper cabinets by positioning them lower and adding mechanized shelving to them.
This is the last part of the series and it’s about flexibility and being able to modify your cabinet’s depending on your future needs. After all it’s your kitchen and it should work for you.
You may find some of these ideas unconventional and unique to ‘standard’ kitchen design as you know it. But if everybody started implementing these changes they would become the norm. As Plato said, “necessity is the mother of invention”.
Think outside the box
Island on wheels
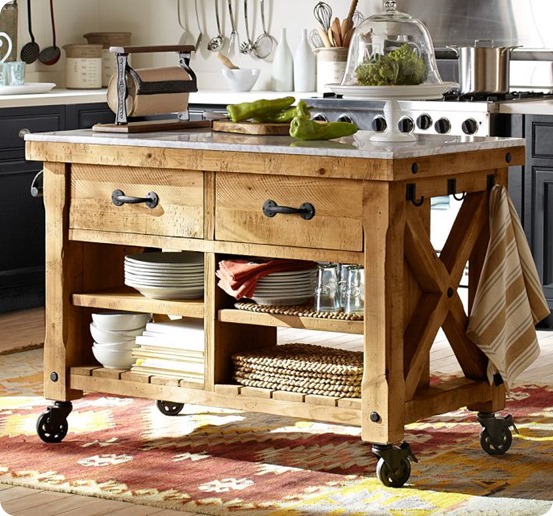
#17) Movable island
Put your kitchen island on wheels or use feet that glide easily without marking your floor. This way it can be moved into positions that are convenient for the current cook.
TIP: Install a solid backsplash or a raised bar on the outer-facing side of the island to help disguise a messy work area. Make the island 32in/81cm high to make it more accessible.
Having an island with open shelving below will make it lighter and easier to move as well as making items more easily accessible.
#18) Mobile section of lower cabinets
This is a section of cabinets on wheels (like a cart) that can be pulled out from under the countertop to expose an open area that a wheelchair could roll under. The top of this cart could be used as a mobile work surface or use the whole unit as a serving cart, or to keep your favorite kitchen tools in and move it to where you are working.
#19) Adaptable cabinetry
Install easily removable cabinet doors, shelves and cabinet base. Choose 1-3 sections that would be the most useful to adapt in the future such as your sink, a work surface and the cooktop. Removing these cabinet sections (now or in the future) will create an open area to sit at or roll up to in a wheelchair. This will require some custom cabinetry work so talk to your interior designer or cabinet maker before you order your cabinets.
Appliance garage
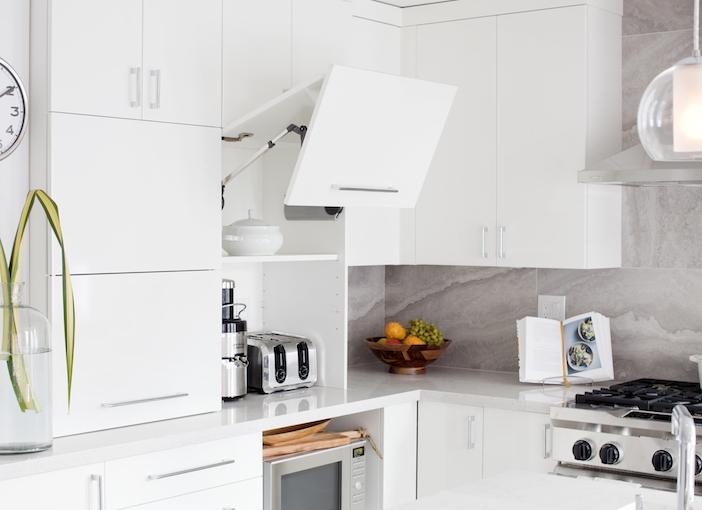
#20) Accessible appliances
Appliance garage. This is a place to store your appliances in a hidden yet accessible countertop location. Lowered upper cabinets (see part 3) may restrict where tall appliances can be kept, so you may need an appliance garage. Equip this ‘garage’ with all the receptacles you will need so you won’t need to move the appliances too far. There is an endless number of ways that these garage doors can be operated from swing-up, fold-back to tambour doors to increase access.
Appliance lift. An alternative way to keep your appliances handy without having to lug them around the kitchen is to use a spring assisted appliance lift. The appliance would be stored in the lower cabinets on a apring-loaded shelf that swings out and lifts up with the appliance sitting safely on it. You can buy the mechanism from Lee Valley Tools as a DIY project or talk to your cabinet maker.
Action Plan
Miss M hopes that these ideas become the norm for kitchen design in the future. Help make your kitchen a more accessible place by incorporating the features you read about in this series. By doing so, you will improve your kitchen’s functionality and accessibility for today and for decades to come.
Talk with your interior designer or kitchen designer about an accessible kitchen. Put in the extra effort now while you have the time to plan how your kitchen will work for you into the future.
Are you ready to get creative and come up with your own solutions for design accessibility? We would love to hear your plans and ideas. Please share them in the comment section below.
Read part 3 of this series